
conservation and restoration of a strigil from the collection of the University of Groningen
origin: unknown, on the basis of stylistic characteristics probably Etruria (Italy); now in the collection of the University of Groningen, inventory number 149, LCM number 00840
date: on the basis of stylistic characteristics the end of the 5th to 4th century BC
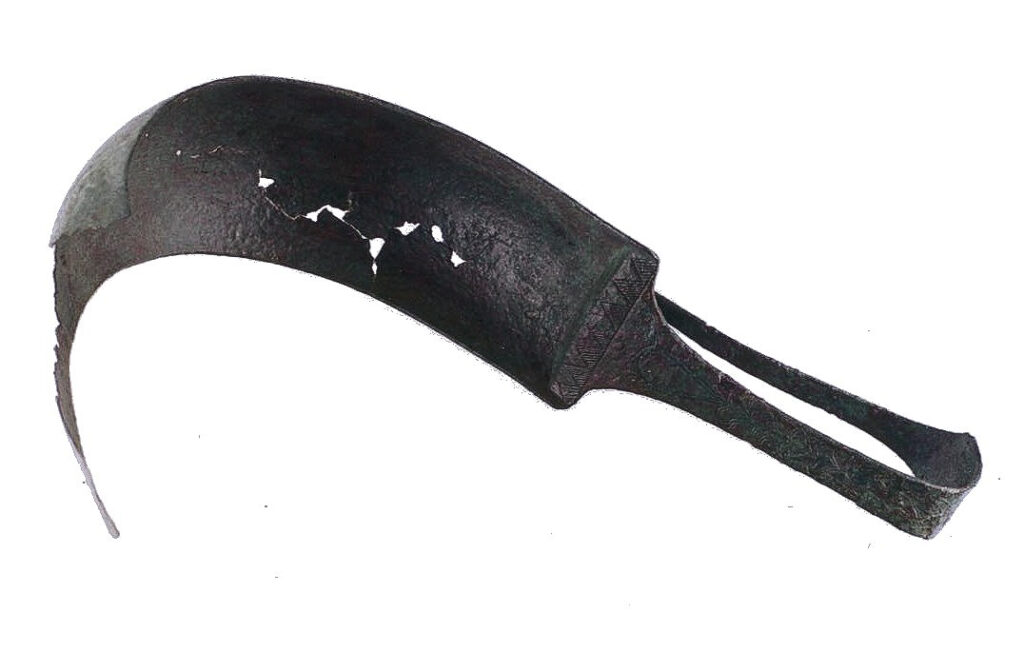
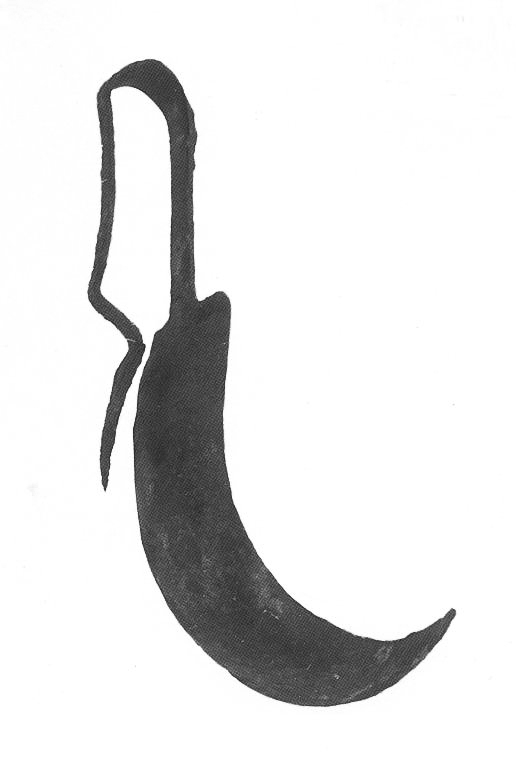
A strigil is a metal object intended for personal care, in use from Antiquity to the Middle Ages. The object discussed here is made of a copper alloy.
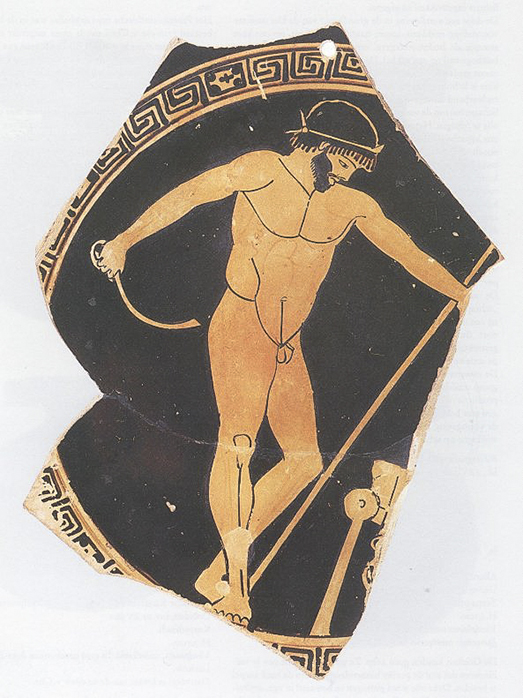
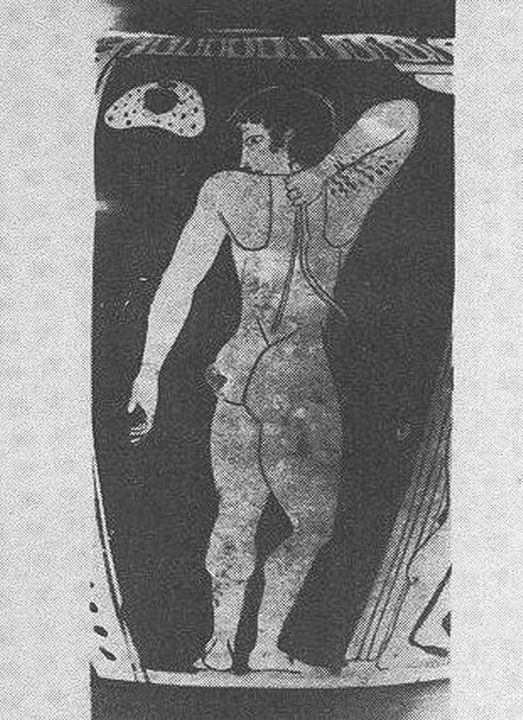
The strigil as an object is mainly associated with the cleaning of the body after sports. In Antiquity athletes used to coat their bodies with an oil, prior to the sport effort. After the effort, oil, sweat and dust were scraped from the body with a strigil before taking a bath. Many images have been passed down demonstrating this application (Figures 22 and 33). At a later stage we also find depictions of women using the strigil as an attribute in daily personal care (Figure 11).
condition before treatment
No information is known about the sub recent origin of the strigil, nor about any treatments to inhibit or stop corrosion. However, passive conservation has been appropriate over the past 10 years because the object has been stored under climatically dry conditions of less than 45% relative humidity (RH).
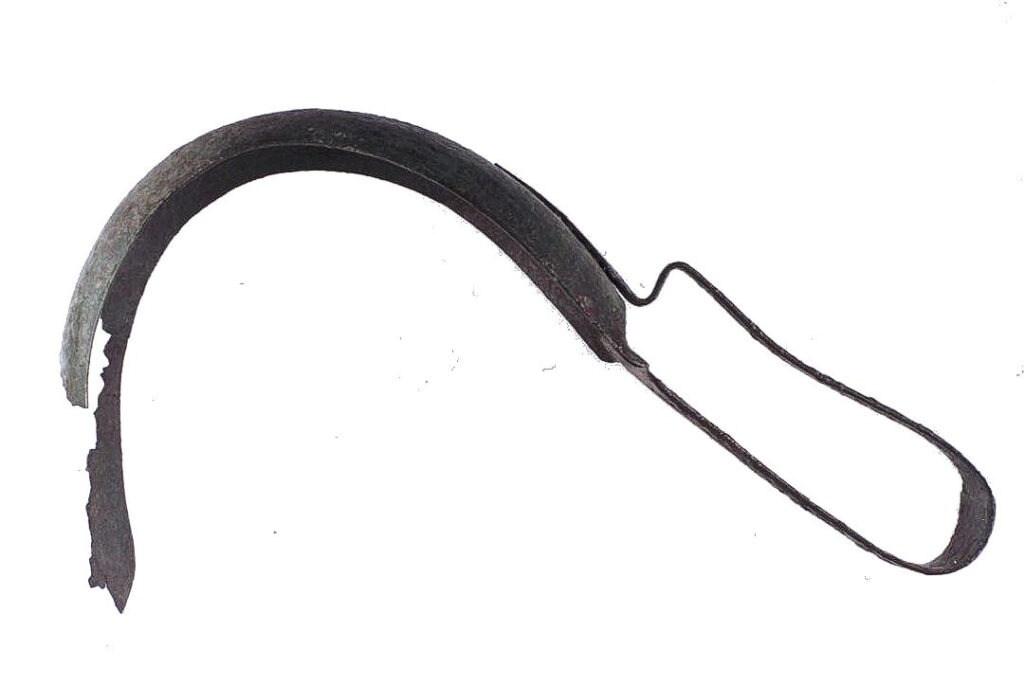
With respect to the current condition of the strigil, two aspects deserve more attention (Figure 4) .
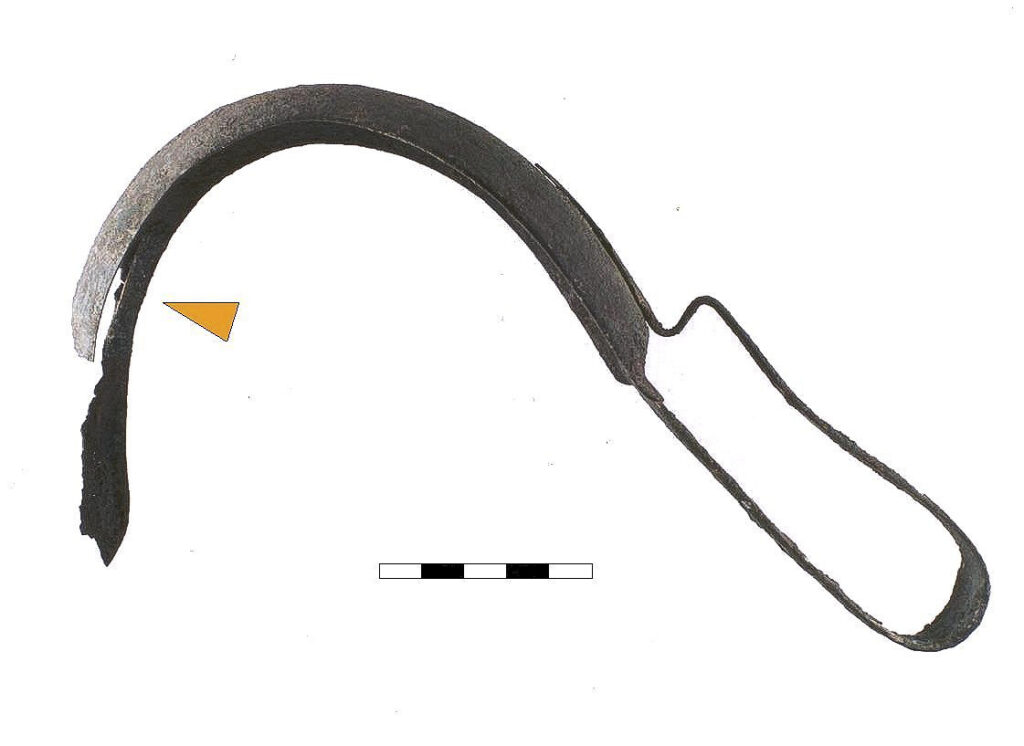
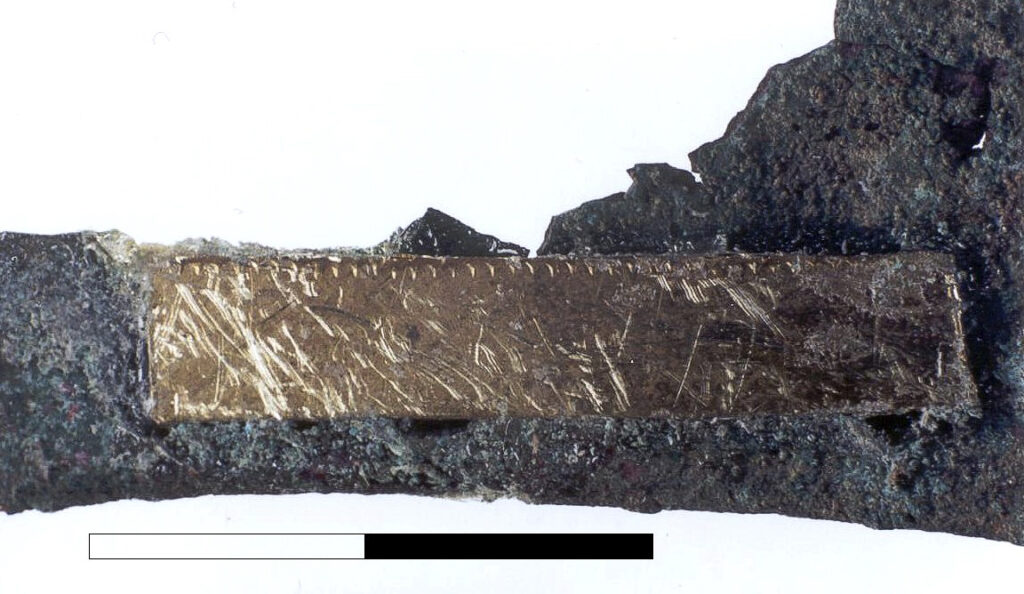
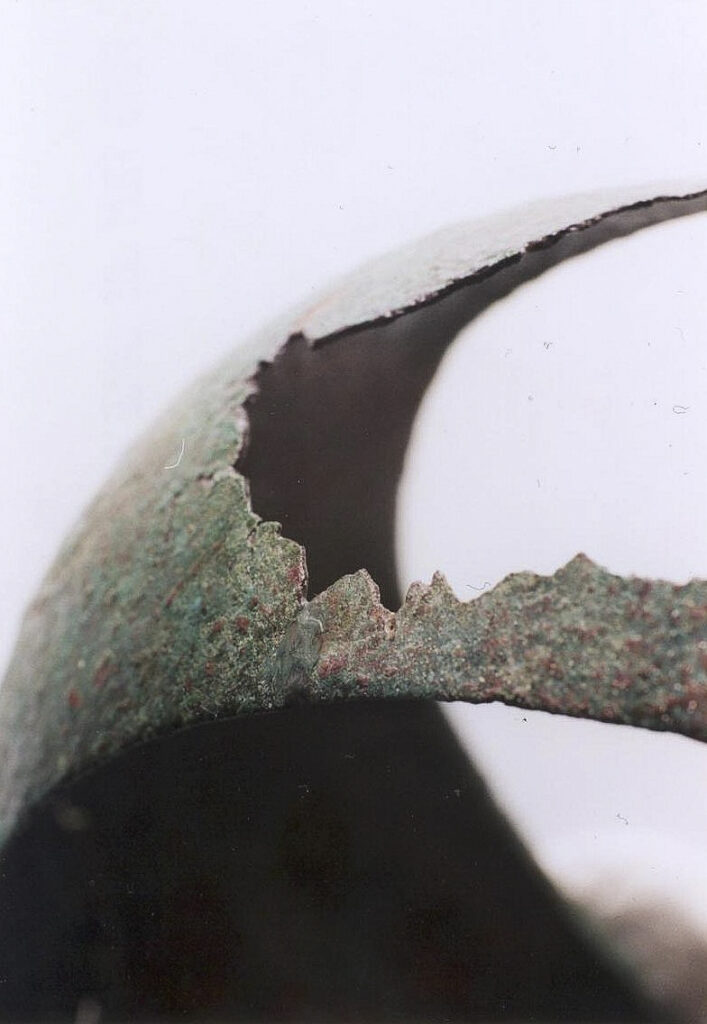
The first aspect concerns the end of the scraper section. It was broken off in the past and had been repaired by means of a small gold coloured metal plate bridging the narrow contact area (Figure 4: orange arrow / Figure 6). The metal plate was covered with transparent glue and sprinkled with green coloured, granular powdery material to make the repair less visible. The granular material resembles model railway grass (Figure 5).
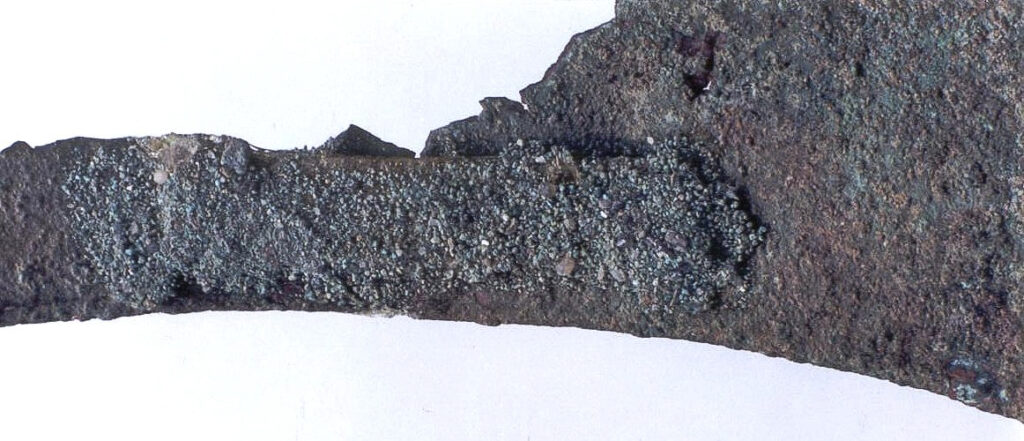
The metal plate appears recent, it does not show any sign of corrosion. The plate is probably made of brass, shows a neat finish and has parallel grooves on one long side, possibly to give the glue a better adhesion (Figure 6).
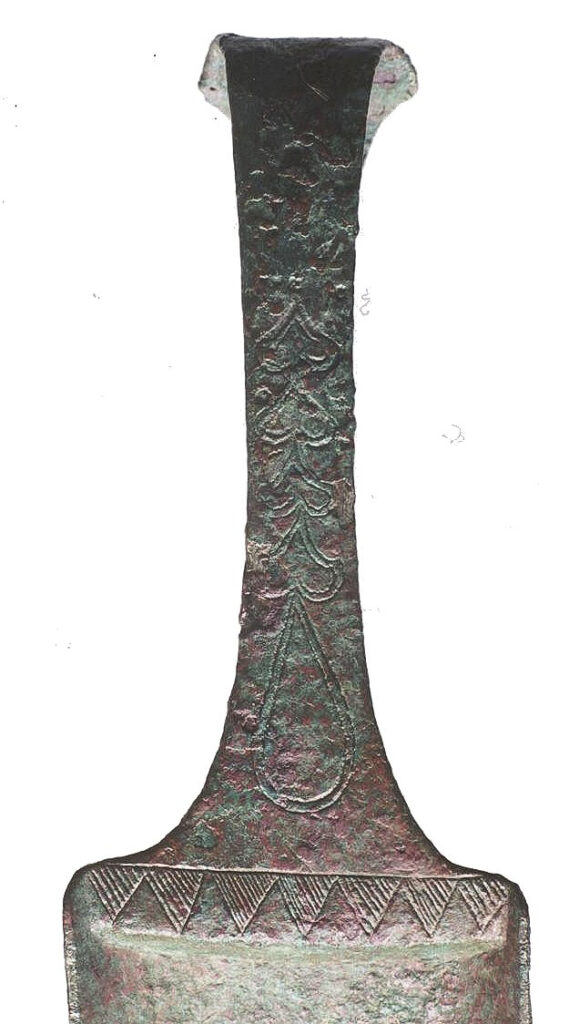
The second aspect involves the surface of the object: the entire strigil is covered with a wide range of corrosion products: red cuprite (copper oxide), green malachite and to some extent blue-green azurite (both copper carbonates), furthermore white / gray nantokite and finally light green paratacamite (both copper chlorides). Chloride-related corrosion on copper is also described as “bronze disease” (Figure 7).
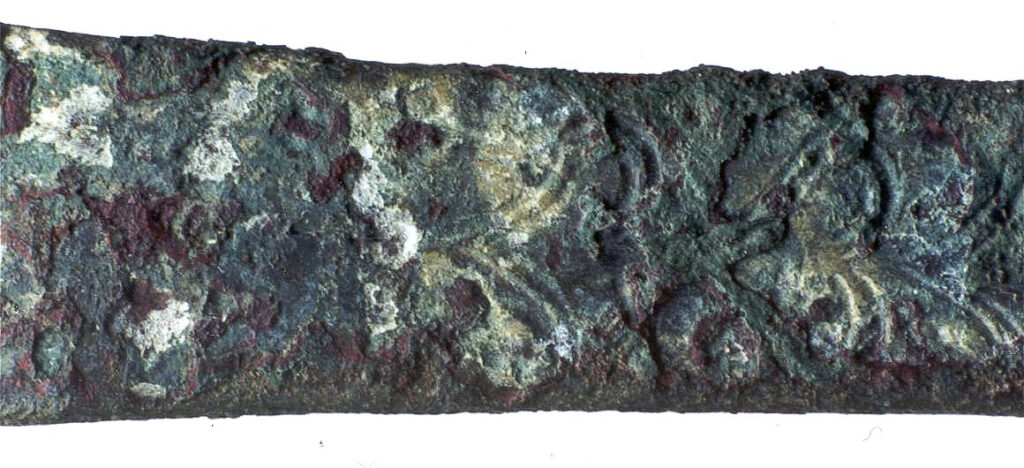
Interesting in this regard is that paratacamite and nantokite are mainly located on the handle. One explanation could be that – after excavation – the object has been grabbed mainly by the handle. The soluble salts that are always present on the human skin most likely have led to chloride-related corrosion on the copper alloy: the aforementioned paratacamite and nantokite. However, if the corrosion-causing chlorides are a remnant of the original use, you would expect formation of paratacamite and nantokite to the same extent over the entire object.
treatment proposal
The presence of chlorides on the object (and in particular on the area where decoration is located) necessitates treatment. In the case of chlorides on copper, a threat of cyclic corrosion is present. The reaction of nantokite with water (vapor) and oxygen leads to the formation of paratacamite with the “residual product” hydrochloric acid. This hydrochloric acid can contribute to the formation of new nantokite4. Treatment initially focuses on removing chlorides or blocking the cyclic process.
In addition, the decoration is hardly visible as a result of the corrosion process. However, the museum quality of the object makes it desirable to remove the corrosion in such a way that the decoration becomes visible again while retaining as much original surface and patina as possible. This cleaning must be done by mechanical means. Any chemical treatment would result in loss of the patina and give a copper-red pockmarked surface. If only the handle would be cleaned mechanically, a noticeable difference in appearance between the handle and the scraper section would be the result. Therefore, the entire object will be mechanically cleaned.
The bridge with camouflage is quite striking when compared to the thin copper and its patina. It distracts. Camouflage and bridge will be removed by applying an appropriate solvent to the adhesive. After dismantling and cleaning, the broken fragment will be reattached to the scraper in an almost invisible manner.
treatment
The object was photographed prior to treatment, incorporating relevant details. In addition, X-rays were taken to determine whether there is still enough metallic core present. Sometimes such recordings show whether the metal is cast or hammered. Sufficient metal was found to be present, the handle is made of a thicker copper alloy than the scraper, but no traces of casting or hammering could be distinguished.
First of all, the camouflage material has been removed (Figure 6). It was easy to cut because the adhesive used was still somewhat tough. The malleability indicates that the glass transition temperature (Tg) of the adhesive is likely to be at or below room temperature. Paraloid B72 may not have been applied then, because B72 has a Tg of 40 degrees Celsius.
Various means of dissolving the glue have been used, but none had the desired effect. However, after more than 24 hours of immersion in acetone, the glue became a little more soft and malleable, making it relatively easy to peel off. A thin layer of corrosion came along with the removal. This was not disadvantageous because this corrosion would have to be removed later anyhow.
Subsequently, most cuprite, malachite and azurite were meticulously cut away using various models of scalpels using a microscope. The cleaning process was complicated due to the complex shape of the strigilis.
There are different opinions on the removal of paratacamite and nantokite5. These are based on divergent ideas about the presumed effect of Benzotriazole (BTA), which is used as a corrosion inhibitor in the conservation of chloride-affected copper. One of the views is that BTA sufficiently buffers the negative effect of chlorides in paratacamite and nantokite, so that it does not need to be removed. In that sense the BTA treatment could even be performed prior to a possible cleaning. Based on this opinion, an aesthetically unambiguous surface without pits may be chosen as the desired result after mechanical cleaning6.
Another opinion assumes that the chloride-inhibiting effect of BTA is not (completely) clear and therefore cannot be guaranteed. That is why we have opted for the best possible emptying of the (tiny) pits in the patina down to the copper. These ‘wells’ are filled with nantokite and often covered with powdered paratacamite. The result is a less elegant surface7.
In the literature on the use of BTA, a connection has been noted between the degree of ‘bronze disease’ and the success of BTA as a corrosion inhibitor. The more active and large-scale the formation of nantokite and paratacamite, the less likely that treatment with BTA will lead to halting the corrosion process8. Due to the high degree of ‘bronze disease’ on the handle, the specimen discussed here has been treated by a nantokite removal method as far as it is visible in surface irregularities. Not all nantokite can be removed this way because it is also under the cuprite layer on the unaffected copper. Based on this, it can be argued that the nantokite in wells does not need to be removed. However, nantokite is more threatening to the unaffected copper as direct exposure to moisture and air is possible. Under the dense layer of cuprite, that threat is relatively smaller, but with nantokite and paratacamite present in pits up to the corrosion surface, that chance is still very real. The latter argues for the best possible removal of nantokite where it is visible on the surface.
The microscopic wells showing nantokite make it difficult to remove chloride containing material by means of scalpels or similar tools. Therefore, an experiment was performed: to what extent could high-pressure grain blasting remove the nantokite more effectively in comparison to the use of only scalpels, provided that the patina should not be affected. Nantokite is a relatively soft, waxy substance.
The experiment was conducted with archaeologically value-free material with a comparable corrosion formation. This material was non-diagnostic and came from the dump of an excavation. The results of the experiment led to the use of walnut grit at a pressure of 1.5 Bar and vibration number 2.59. The nantokite could be removed effectively from wells without affecting the patina (Figure 9). The very slight increase in gloss on the surface was visisble under the microscope, but barely noticeable to the naked eye, and is secondary to the greater however still slight increase in gloss that will occur when the strigil needs to be coated after the BTA treatment.
After mechanical cleaning and immersion in a 3% solution of BTA in alcohol, the object was coated with a thin layer of Paraloid B72 in acetone. This “lacquer coating” protects the applied BTA against deterioration by exposure to ultraviolet light, protects against physical damage to the BTA film and also forms a buffer against dirt, dust and sweat. A disadvantage of such a “lacquer layer” is the slight darkening of the object and, as mentioned, a slight increase in gloss on the surface (Figure 13).
after treatment: passive conservation
The “lacquer coating” ensures that an affected copper object like the strigil could be stored at 70% RH without further decay10. However, for two reasons it remains desirable that the strigil should be stored or exhibited under controlled conditions at an RH of <35%. First, it prevents the nantokite from reverting to cyclic corrosion in the event of incomplete buffering by BTA. Second, it requires less intensive monitoring for possible changes in further decay.
The strigil can be stored in two ways under controlled conditions.
1 In an airtight container with the addition of silica gel and an RV indicator strip.
2 In a climatically controlled showcase / room where the humidity is kept constant and low.
In both cases, the RH must be kept stable and should remain below 35%. A combination of both requirements provides the best guarantee for halting chloride-related corrosion. When exhibiting in a display case, exposure to UV from daylight or artificial light must be kept as low as possible. Periodic checks on the condition of the strigil and on the effectiveness of silica gel remain necessary.
dating
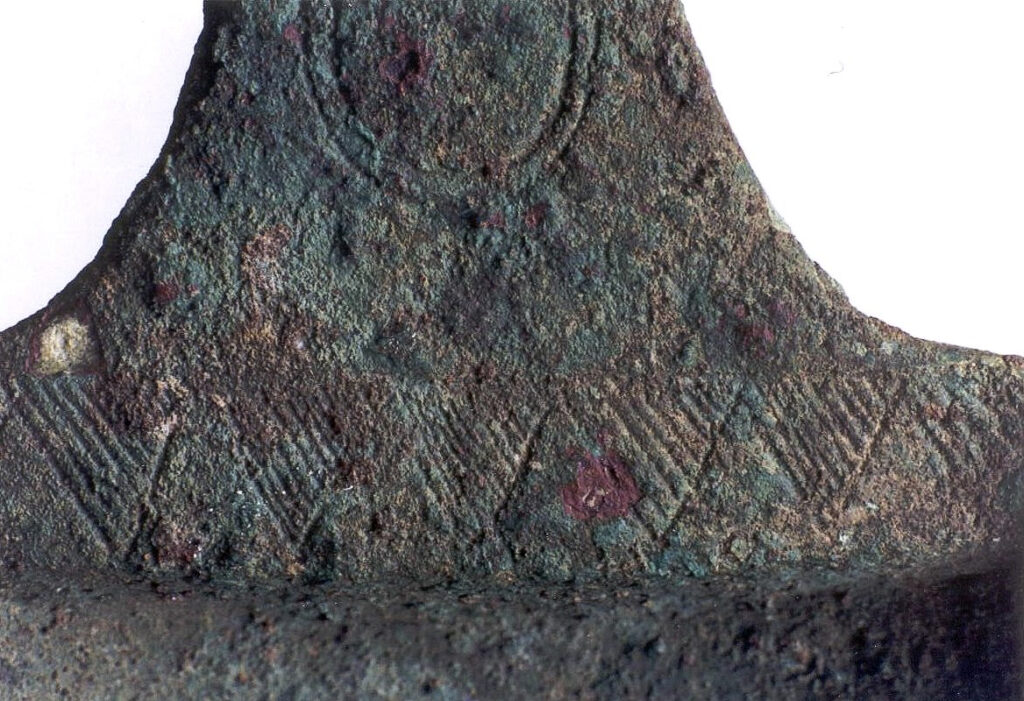
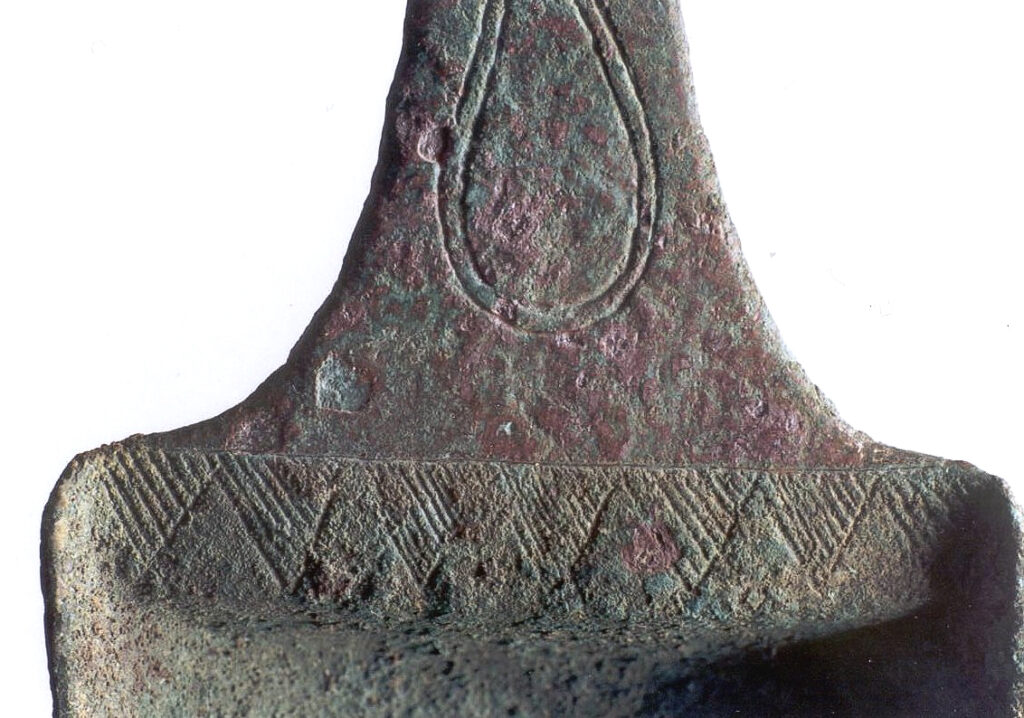
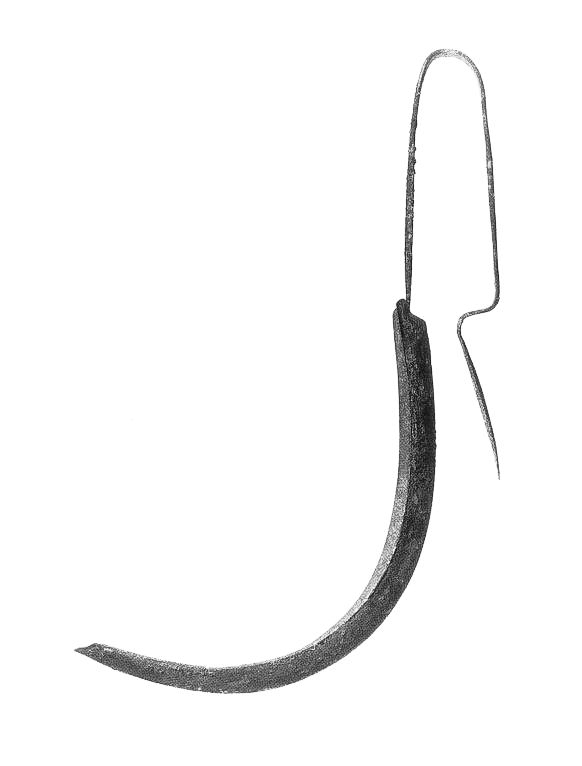
In time, the shape of strigils has undergone a development, in which in particular the handle offers some indications to date the object in time as well as its geographical origin. Indicative for the treated specimen is the loop-shaped handle, as well as the fact that the handle has been attached to the scraper section. These stylistic features are considered to be representative for types ranging from the 5th to 4th centuries BC. (Figures 14 and 15). The decoration on the handle , which represents stylized flowers, does not provide a basis to determine origin or dating because developments in the decoration lack a clear pattern11.
further reading
Parts of the text for this contribution are taken from, or adapted from: Maassen, J.M; Een strigilis nader bekeken, een onderzoek naar de herkomst en de restauratie- en conservatiemogelijkheden; minor thesis GIA; Groningen, 2003.
- 1 Rollig, S. & T.G. Natter: Klimt and Antiquity, 2017, p 204.
- 2 Vanhove, D. (ed); Sport in Hellas – van spel tot competitie; Gent, 1992; afbeelding 81: fragment of Attic Red-Figure pottery, around 480 BC, Archäeologisches Institut Tübingen, inv. nr. S./10 1559
- 3 Kotera-Feyer, E.; Die Strigilis; Frankfurt am Main, 1993; figure 8b: Attic, Red-Figure crater (detail), Museo di Bari, nr. 8693
- 4 Cronyn, J.M.; The Elements of Archaeological Conservation; Londen 1990; p 226
- 5 o.a. Stambolov, T.; The corrosion and conservation of metallic antiquities and works of arts; Amsterdam, 1985; pp 108-115 / Cronyn: pp 228-229
- 6 Cronyn: pp 228-229
- 7 Weisser, T.D.; The use of sodium carbonate as a pre-treatment for difficult-to-stabilise bronzes; in Recent advances in the conservation and analysis of artifacts; Londen, 1987; pp 105-133
- 8 Weisser: pp105-133 / Keene, S. ed.; Corrosion inhibitors in conservation; Occasional Papers no. 4; London, 1985
- 9 Kurval Micromat 100, version 1995
- 10 Cronyn: pp 228-229
- 11 Kotera-Feyer: 154
- 12 Vanhove; figure 91: Musee de Mariemont, Morlanwelz, inv. nr. B 320
- 13 Vanhove; figure 92: Allard Pierson Museum Amsterdam, inv. nr. 11.887
figures 4-13: photos J.M. Maassen / GIA. The analog photos have been digitised afterwards.
2003 © GIA